Thursday, March 2, 2017

Happy Chocolate Bunnies: Stampin' Up! Artisan Blog Hop

Hello!! Welcome to the Stampin' Up! Artisan Blog hop. There are 20 of us from around the world so be sure to follow along to see every one's projects. You should have just come from Holly's blog. She had some fabulous projects for you this week!

For this blog hop we are focusing on anything that came in our box. That was tough since there were so many great things to choose from. And then for some reason I was having crafter’s block. I made the card from Monday’s post and was feeling motivated to get more things done and I had all these ideas in my head. But when I started putting them to paper, they just weren’t turning out how I had hoped. Ever have that happen?? It’s the worst. Some days I’m on a roll and all these cute ideas in my head work out perfectly and then other days, Blech! Nothing.


So when I was working on my other Artisan projects using the Basket Bunch set, I had started a card with these bunnies. I wasn’t sure if I was liking these either so I decided not to use them for my other post. So they were just sitting on my desk staring at me. Then I decided I wanted to cover them with the Fine tip glue. Sara Douglass shared this fun idea a few weeks ago about using the glue to cover one of the monsters from the Yummy in my Tummy set. I thought it was a cool idea so I tried it on the bunnies. And then this project just sat here while it dried and then sat some more. Those poor bunnies! I knew I couldn’t let them go to waste so I finally sat down and finished this card. And now I think it’s super cute!


I started off water coloring my background with Pool Party, Tempting Turquoise and Dapper Denim inks. While the shimmer paper was still a little wet, I stamped one of the splatter image from Gorgeous Grunge with the same color inks. I die cut and glued all of the bunnies with dimensionals to the watercolor background. I decided to put them on the background first before applying the Fine Tip glue. It was easier to do it this way with them already elevated from the background paper. Applying the fine tip glue to the bunnies was oddly soothing, haha!! Just make sure to go lightly and not add too much. As you can see from the top middle bunny he had a little too much and got a little bubbly. Once these were all dry, I added the Blushing Bride twine, the sentiment (which is so funny!), and some embellishments. If you look closely you can see clear sequins on some of the splatters.

Here is one more close up of the chocolate bunnies for you!!

My next card uses the Happy Celebrations set. This is a really cool set to work with. I can't wait to make more cards with this set.


The first thing I did was stamp the word Happy in Peekaboo Peach. I used the “kissing” technique on this. What that means is I inked up Happy in Peekaboo Peach and before I stamped it onto the card stock, I used the small circle stamp inked with Watermelon Wonder and stamped it in random places on the word Happy. So when you stamp Happy on your card stock, it will come out in Peekaboo Peach with Watermelon Wonder polka dots. Fun, right! After that I used the embossing folder to emboss the word. Then I used the circles from the set and stamped them several times in Peekaboo Peach and Flirty Flamingo. I would ink the circle up once and then just keep stamping on the white card stock so you can several circles in various shades, all getting lighter and lighter. I cut out 4 circles from the Layering Circle Framelits in Dazzling Diamonds glimmer paper and glued them to the card. I then added some twine, the sentiment and some embellishments.


I hope you enjoyed today’s cards.

Next up is Jessica Winter. Click below to check out her amazing projects! She is so talented!


Product List

Monday, February 27, 2017

Perfect Mix Thank You card


Happy Monday! We had a low key weekend here so I was able to fit in a little crafting time. I used the Perfect Mix set from the Occasions catalog. I actually overlooked this set in the beginning and just ordered it recently. It’s a really fun set. The images are super cute. You can color them in or stamp them on card stock if you don’t feel like coloring. Which is what I did. I stamped the pot holders onto Peekaboo Peach cardstock. I embossed them too with the Hexagons embossing folder but you can’t really see it in the photo. In my head, I was thinking of quilted pot holders that I have at home. So the embossing folder kind of gives it that look. It didn’t exactly come out how I hoped but I still thinks it’s pretty cute.

I used the Tasty Treats DSP because I love the fun springy colors of in this pack. Since we had such warm weather last week, I was in spring mode! Some other fun things on this card are the gold thread behind the stitched circle, some metallic enamel shapes, a cute gold paper clip. I actually just found these paper clips in my artisan box from last month. I had totally forgotten that we got these (I know, first world problem here!). I was looking at them in the catalog the other day and was thinking how cute they are and I didn’t have them. Umm nope, I do. I just need to get my stuff organized better. But back to the card. The final touch is the pretty bow! I used the Tip Top Taupe mini striped ribbon for this bow. I love a nice pretty bow! Swoon!


I had so much fun with this set. Now I have a bunch of other ideas in my head for this set. I can’t wait to sit down and play with it a bit more.

Have a great day!


Product List

Friday, February 24, 2017

SAB Tasty Trucks Swap


Happy Friday!! It is going to be another nice warm day here on the east coast! This weather is such a tease. I feel like spring should be here next week but I'm sure we'll be back to the super cold weather in no time. So we've been taking advantage of this warm weather and getting outside after dinner a couple of nights this week. But that means less time for crafting this week. Luckily I have a couple of cards that I haven't shared yet.

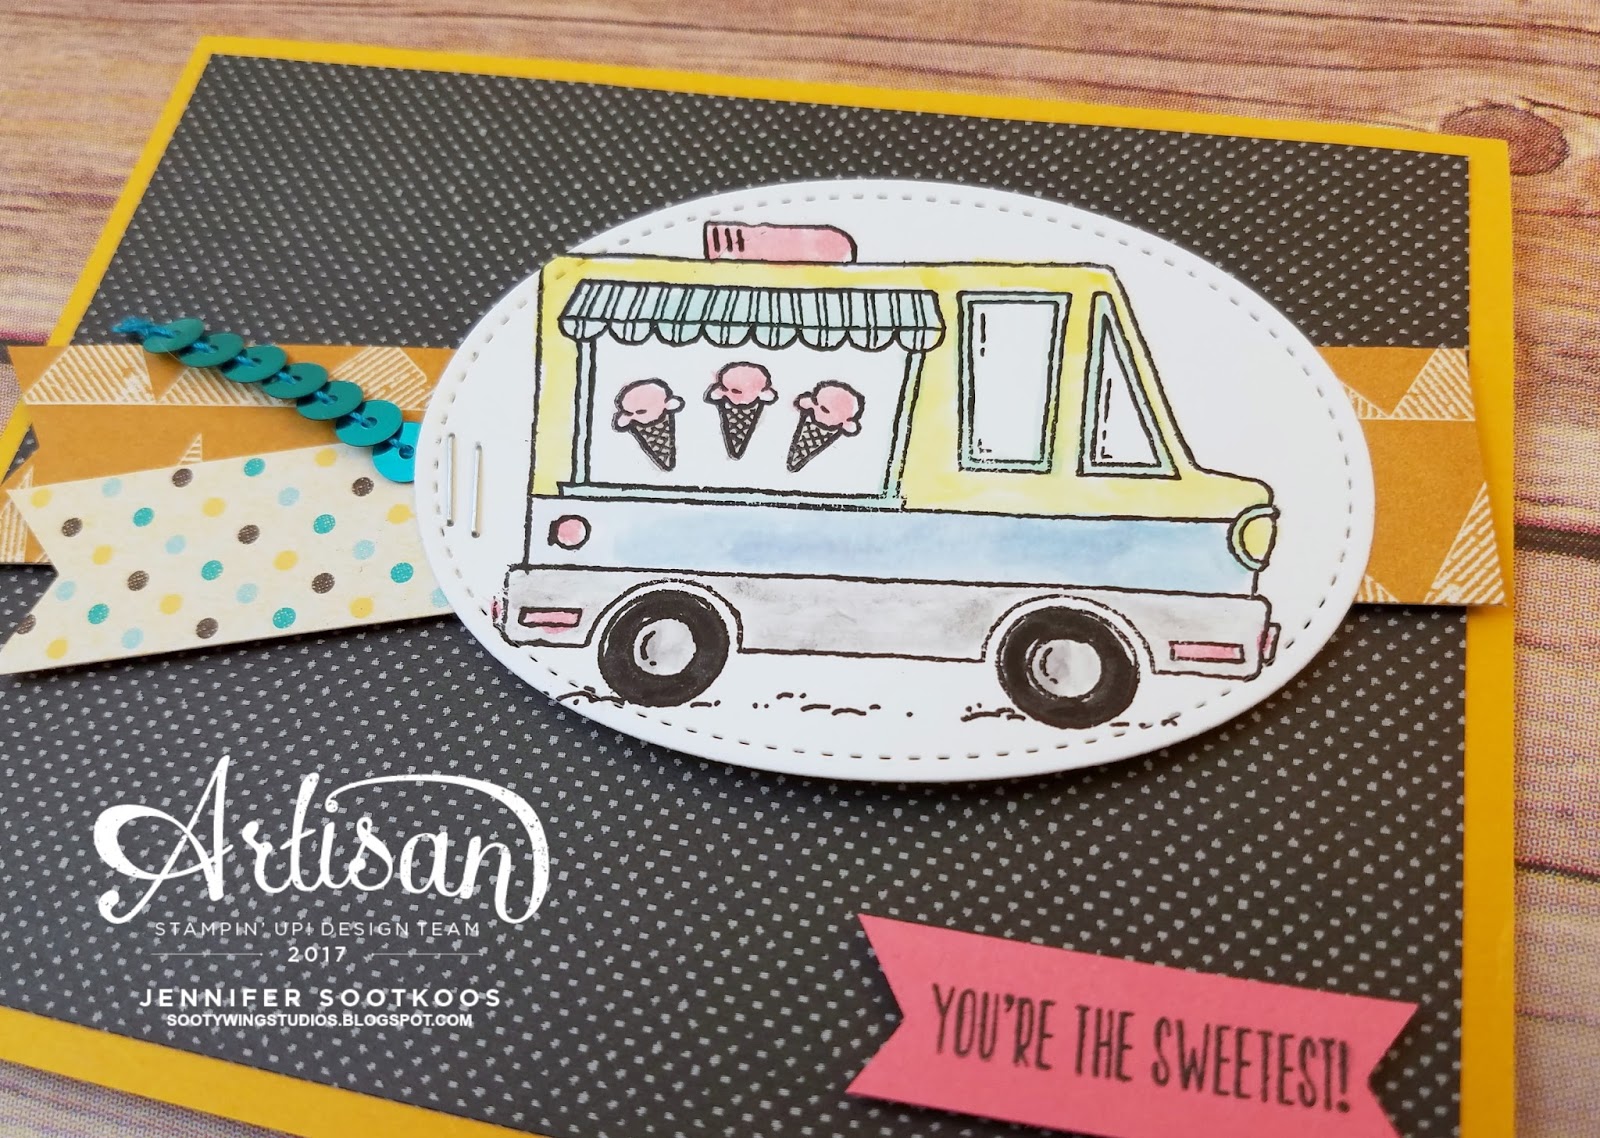
First up is my SAB swap for a recent demo event I went to at the beginning of the month. We are still in the heart of SAB so make sure you earn this super cute food truck set. I love this truck!! I do want to try to make some cards with some of the smaller elements from the set but for now, I'm using the fun truck.


I colored the truck with an aqua painter and various inks. The truck just barely fits inside of the large stitched shape oval. Just the top left corner got a little cut off but I think it's fine. If I was only making 1 card I would have cut the truck out but I wasn't about to do that for 12 cards. Plus I waited until the last minute to do these and would have never had time to get them all done if I cut them out. Anyway, I then layered that on some Urban Underground DSP. The polka dot DSP is from the Cupcakes and Carousel DSP. I like how you can use DSP from different sets and they still match and look good together. Then I just added some Bermuda Bay sequin trim and stapled it all to the oval. Quick and simple!


I hope you enjoyed today's card. And if you have warm weather near you I hope you are enjoying it as well. If you are stuck with snow, I'm sorry. :)

Have a great weekend!

Product List