Showing posts with label paper pumpkin. Show all posts

Tuesday, May 19, 2020

May Paper Pumpkin Alternative


Hello! We are still having some weather here so I feel like spring is finally here to stay!! Yay! Yesterday in the mail, I received my Paper Pumpkin kit for May. It's been a while since I've been part of the Paper Pumpkin family but since we've been at home the past couple of months, I thought it was a good time to rejoin. My daughter has been into making cards a lot lately so I thought these kits would be fun for her to help put together. I love that these kits have everything you need to put together some cute projects! This month's kit was extra special because it included the new 2020 - 2021 In Colors. These new colors are so great!! Just Jade, Bumble Bee, Cinnamon Cider, Magenta Madness and Misty Moonlight are the new colors. So far I think Magenta Madness is my favorite but I'm sure it will change over time!


For my first card, I decided to mix things up a bit and use pieces from the different cards to put my own card together. For some reason, I like coming up with my own cards before making them according to the instructions. But the cards that are shown are also super cute and I will be doing those next!


For more information on signing up for Paper Pumpkin, please contact me. These kits are great if you want to do some crafting but don't feel like making a big mess. Everything you need comes in the box so it's perfect for crafting in the living or outside on a nice day!

Have a wonderful day!

Tuesday, October 9, 2018

September Paper Pumpkin - Halloween Cards


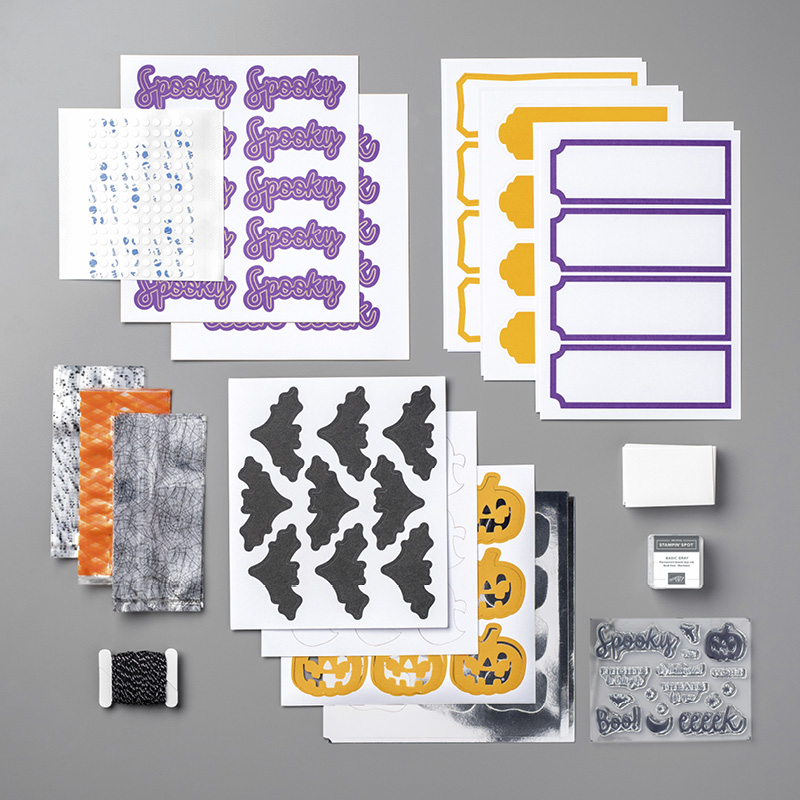
Hello!! I have some super cute Halloween cards to share today. I don't normally make too many cards for Halloween. But I decided I wanted to use this month's Paper Pumpkin kit to make some fun cards. The kit this month features all the supplies needed to make adorable treat bags! I LOVE the kit this month. My kids even had fun putting their own treat bags together. Since I knew I wasn't going to make all of the bags, I decided to take a few of the elements from the kit to make some cards.


These cards came together pretty quickly. I used a few of the sheets from the Brights Designer Series pack (Mango Melody, Granny Apple Green and Gorgeous Grape). After I cut out the large piece for the background, I saved the skinny piece that was leftover and added it to one of the cards with a different background color. 


As you can see, each card has one of the elements from the kit (ghost, bat and pumpkin). I then cut circles with the Stitched Shapes Framelits as a layer behind those elements. Each card also has a stripe of Mini Stripe Gorgeous Grape ribbon.


I also added the black twine to each of the cards as well. I used the stamps to stamp some of the sentiments as well as those creepy spiders and bats! :) The word Spooky was one of the stickers from the kit. I did the pumpkin card last and I think I might have used the stickers on the other cards too if I would have thought of it sooner. Oh well, they are still fun cards!


Do you have this kit? Has anyone else come up with other fun ideas? With just a few additional supplies from your stash you can use the stamps and other elements from the kit to make cards as well! It's a great bang for your buck!


From now until tomorrow (or until supplies last), if you sign up as a new subscriber to Paper Pumpkin your kit the first month is only $5!!! Sign up now! What do you have to lose??? Use Promo Code FLASH1018 when checking out!

Have a spooky day!!

Wednesday, January 10, 2018

Paper Pumpkin Red Box Challenge

Happy Wednesday! Today's project is for Stampin' Up!'s Red Box Challenge. What is that, you ask? It's a super fun giveaway from the Paper Pumpkin team. You have to create a WOW project with an unused past Paper Pumpkin kit, post it to Facebook or Instagram with #redboxchallenge and you will be entered to win the March kit! How fun is that. And lord knows I have tons of old kits lying around, ha!


I chose to use the March 2016 kit - Pocketful of Cheer.


This kit has lots of fun elements to make several gift cards and cards. I wanted to use the mini treat bag die to make another gift card holder. I LOVE this die. It's one of my favorites. With just a few additional items you can make this too.

I cut the mini treat bag out of Pool Party card stock. Then I used one of the envelopes and die cut that as well so the front of the bag has the floral paper. Inside the mini treat bag, I used one of the card bases cut to 3 1/2 x 5 and added one of the Bermuda Bay belly bands. Then I glued on the gift holder pocket and punched 2 little banners from the gift card enclosure.


The front of the bag also uses one of the gift card enclosures. That was punched with the starburst punch. Two more little tags were added, along with a doily and the bakers twine bow.

I hope you like my WOW Paper Pumpkin project. I'd love to see your projects for this challenge!

Thanks for stopping by!

Friday, November 18, 2016

November Paper Pumpkin


Happy Friday! So another interruption in display samples. :) I had to share my alternative ideas for this month’s paper pumpkin. I just got it yesterday and it is super cute! One of my favorites. Now the cards are a little on the smaller side but they are still adorable none the less. I made one card by the instructions and then 2 alternatives. I made a shaker card and then used the leftovers from that to make a cute little tag.


The denim dapper card is a normal 4.25 x 5.5 size card. I cut up the envelope and stamped it with the snowflake stamp which I then glued to the dapper denim base. I used the stitched framelits circle to make a border for the shaker card. Inside the shaker I used 2 of the pieces from the kit (the blue houses and green trees). I had some leftover snow from last year’s card kit in the holiday catalog which I used inside the shaker. The back of the shaker piece is the vellum from the kit. After I adhered the shaker I added the ribbon and sequins. I also added the sentiment on the bottom corner. This was stamped on some scraps from the house piece.


The tag was super easy. I cut up one of the cards and then just used the scraps from the houses and trees. I stamped some little snowflakes, the sentiment and added a sequin. So simple yet so cute! This would look adorable on a bag. Who wouldn’t love a tag like this on their gift and then open up one of these fabulous cards!

If you are interested in getting a kit like this sent to you each month, please contact me! They are such fun surprises each month and there are lots of fun alternatives to them as well.


Have a great weekend!!

Friday, October 21, 2016

October Paper Pumpkin - Napkin Rings


Happy Friday! I have a super cute project to share with you today. I used the October Paper Pumpkin kit to make some festive decor for your Thanksgiving table. I haven't put the kit together how it's instructed because I had this idea in my head that I wanted to try first. I love that there are so many other options with these paper pumpkin kits, not just what is shown. But if you just want to do it the way it's instructed that is ok too!!! Those cards are cute as well!!


I wanted to make shaker napkin rings. There are still a few tweaks I need to make but overall I love how they came out. I used my circle dies to cut around the the leaf cut out. I did have to use 2 of the vanilla leaf cut out pieces they gave you. But I'm sure I will find another way to use up those scraps. I adhered the acetate behind the cut out, then using the dimensional strips I wrapped those towards the edge of the circle so it would keep all of the sequins inside. This was glued to the different color square pieces from the kit, then I die cut the scalloped Old Olive circles and glued those to the shaker circles. I also cut apart the card stock base to use as the base of the napkin ring. The strip of DSP is from the envelopes. The one thing I would tweak is that I would add some ribbon or card stock around the edge of the circle so you can't see the dimensional strip. (You can see that in the photo below).


What do you think?? Fun, right? If you get the Paper Pumpkin kit this month I would love to see what you do with it.

Have a nice weekend!

Friday, June 3, 2016

April Paper Pumpkin and the New Catalog!!!


Hello! So I just realized that I never posted this project. I actually started writing the post but apparently never finished it. So here it is for you today. Today's post shows you April's Paper Pumpkin kit. This kit was a 3d project and I loved it. I know some people aren't exactly a fan of the 3d projects in the Paper Pumpkin kits but I think they are so fun. I have tons of supplies to make cards so I like the surprise of a 3d project every once in a while. This wreath was fairly small but so cute. It fit perfectly above my sink in my laundry room. I decided to spice it up a bit by added a Crushed Curry flower using the spiral flower die. Isn't this so cute! I picked up a few more kits so I plan to make a couple more as gifts for my mom and whoever else wants one!


And on to other super exciting news! The new Stampin' Up! catalog is now live. Quick, go check it out and place your order. You will love this catalog. I think this is one of the best yet! My wish list is huge! I placed my order on the 1st and should get it next week so I cannot wait to start playing and showing you guys some new stuff!


If you want to see some new products, I will be having an open house on June 28th. Contact me for more details.

But if you can't wait that long, have your own workshop. There is an awesome perk for being a hostess this month.
Hosts who have qualifying events with $350 USD or more in sales during the promotion period will receive $35 USD in Extra Stampin’ Rewards for the order. That's fantastic. That means you can get at least $77 in free product! You will want that for all of the great stuff in the catalog. Contact me now to set up your workshop! :)

Have a great weekend!

Wednesday, May 18, 2016

May 2016 Paper Pumpkin - Alternative idea


Hello! I am back today with an alternative idea for May's Paper Pumpkin. It was a first for me but I went to work right away on this idea the day I got the kit. Normally my kits sit for a bit before I get to them. I wasn't even super thrilled about this at first but now after seeing it in person, I think it's really cute! Instead of putting the kit together as intended I decided to play around with an alternative idea first. The first pic above shows how the kit should be put together and the rest of the pictures are the alternative ideas. I used the Mini treat bag framelits to make a pocket for the card. I cut apart the white cards that come in the kit so I could just use the white overlay on the orange corrugated paper. I cut everything so it could fit inside the treat bag. I think I should have trimmed it a smidge smaller so that it fit inside the treat bag more smoothly but overall it's fine. Also, I should have stamped the 2 words first and then add the cake stamp since the spacing is a little off. I'll fix all that on the next one I do. :) The actual treat bag uses several stamps from the set include. I put the sentiments and arrow on one block and kept stamping. Then I went back with the arrow and added that to some of the empty spaces that were left. The star and the star border cut outs are also from the mini treat framelits. For the star border I used the glitter tape from SAB. I just put it on a piece of white cardstock and ran that through the big shot. That cute little star epoxy sticker is from the kit. They are adorable! I just love the little accents that the Paper Pumpkin kits come with. Well I hope you liked this alternative ideas from this month's Paper Pumpkin. If you have any questions on how I did anything please let me know. And if you would like to get your own kit every month to make these fun projects, please contact me! I would love to show you all of the fun things you can do with these kits. In the next day or 2, I'll post the fun project from April's kit.

Thanks for stopping by!


Stamps: May 2016 Paper Pumpkin
Ink: Pool Party, Midnight Muse (The kit comes with Night of Navy but I couldn't find my Nigh of Navy paper so I went with Midnight Muse)
Paper: Pool Party, Cut out overlay and Orange corrugated paper - May 2016 Paper Pumpkin
Accessories: May 2016 Paper Pumpkin, Mini Treat Bag Framelit dies, stapler, banner punch


Monday, January 26, 2015

January Paper Pumpkin


Happy New Year! I cannot believe my last post was in November. I did have 1 or 2 Christmas cards that I wanted to share but obviously time got away from me. And who wants to see them now, I'm in a Valentine's and spring mode. Especially since we are about to get a WHOLE lot of snow here in the northeast. Luckily I finally got my craft area cleaned up so maybe I'll have some time tomorrow to work on a card. That is part of the reason for my silence on the blog too, amongst having 2 little ones to take care of. But my craft area was a complete disaster which made it hard to want to work on anything. But since I have all these fun new things to play with, I had to make it my mission to get it cleaned up. So it's clean but it could definitely use some organizing/getting rid of stuff but that is for another time! Since it's been clean, I've been able to make 3 cards in the past few days. What a difference it made. Let's hope it stays neat for a little bit. Now for today's card. I used this month's Paper Pumpkin kit to make a card. The kit includes things to make little valentine goodie bags. I may use the kit for some goodie bags but I knew I wasn't going to use all of the elements for the goodie bags so I wanted to make a card. I used the Hearts a Flutter framelits to make banners with the tags from the kit. The red and pink banners are also from the kit. I just cut them to make them a little smaller. The banner is hanging on the super cute pink and gold twine from the kit. I used the heart stamps from the kit and stamped them onto watercolor paper. I used my aqua painter to make them look like water color hearts. I couldn't figure out what pink was used in the kit so I ended up using Calypso Coral because I thought it kind of matched. But when I stamped it, it didn't seem to match quite like I had hoped but I still think it looks cute. The sentiment is stamped in Gold ink and then embossed. I thought it added a nice touch. I really love all of the elements in this kit. I hope to make some more cards or even the little bags with them.


I am trying out something new with the products that I used. Instead of writing out which ones I used, I am linking the actual products that I used. I think this will look much better than how I used to do it. I hope you like it. Thanks for stopping by!

Built for Free Using: My Stampin Blog

Monday, July 21, 2014

July Paper Pumpkin


Happy Monday! I know I have yet to share the couple of things that I did with the June Paper Pumpkin kit but I really wanted to share what I did with the July kit. I just got it and had to play with it right away. I am loving have some of this extra time to get some stamping in. I know that any day now that will change with baby #2 arriving but I am taking advantage while I can. So this month's kit comes with cute little boxes, ribbon to tie up the boxes and then supplies to make 6 cards. It uses the new Blackberry Bliss in color which I absolutely love!!


So I first put the box together and added the fun little tag to it. Then I made one of the cards which took me about 5 minutes to do while I was sitting at my kitchen table. So easy! Then I wanted to make a card using a few other supplies. Actually the only additional item I used on the 2nd card was the Chalk Talk framelit dies. But you could easily make your own tag without using this die. I did cut up one of the boxes for this tag.


Is this month's kit super cute or what. If you are interested in signing up for this, now is the time. From now until September 10th, if you sign up you will get 50% off your first 2 months. That is a great deal!!! You get the convenience of products and projects being delivered right to your door plus a fun little surprise each month. Contact me for more information on My Paper Pumpkin.

Thanks for stopping by. I may have another card or two this week with July's kit so stay tuned.

Thursday, July 17, 2014

Freshly Made Sketches 145

Hello everyone! Today I am sharing a card I made using the sketch from Freshly Made Sketches. I haven't played along with these challenges before but I had some time today and I liked this one so I decided to give it a whirl. Check out the Freshly Made Sketches site for other sketches they have. I need to start using these sketches more to kick up my mojo.


I rotated my card from the sketch but that's the fun in it. You can use these sketches as any kind of inspiration. I decided I wanted to use one of the pinwheels from the June Paper Pumpkin kit. I have yet to show you what I did with the June kit but here is a fun alternative project with the pinwheels. (I actually used most of the other pinwheels for my son's 2nd birthday party - I'll write a post on that soon). So I trimmed the pinwheel so it was a little smaller to fit on the card. The base of the card is one of the new in colors - Hello Honey. I'm still getting used to the new colors but this one seems pretty nice. So far my favorite is Blackberry Bliss. The designer paper used on this card is from the Moonlight Designer Series paper stack. I really like a lot of the papers in this stack. The 2 banner pieces are from this collection as well. In the bottom corner I stamped Happy Birthday from the new set "And Many More". This is just a great little versatile set. I'm sure I will be using this a lot. Included in the paper pumpkin kit was Basic Gray baker's twine which I looped around the center of the pinwheel a few times. Then I finished it off with 2 gold sequins I had laying on my desk. I hope you enjoyed today's card and will give this sketch a try.


Stamps: And Many More
Ink: Night of Navy
Paper: Hello Honey, Moonlight Designer Series Paper Stack, June Paper Pumpkin
Accessories: June Paper Pumpkin (Baker's twine, brad), Gold sequin trim

Thursday, June 19, 2014

Paper Pumpkin - April & May

Hello! So I am a bit behind in posting my April and May Paper Pumpkin projects. I did actually have both the mother's and father's day ones done in time but I just didn't have time to post them. I think these were both so cute. I am loving how easy these projects are. Since my crafting time and my mojo have been on the outs lately, the Paper Pumpkin has saved the day. It's nice that everything is included in the kit for you saving so much time! I do try to make one project a little different than the ideas Stampin' Up! shares just to give you other ways to use the kit with your own supplies. But you certainly don't have to do that if you don't want to. I am now just waiting on my June kit. I had some problems with my credit card so it hasn't arrived yet. I'm hoping it does soon because I would love to use the June kit for my son's birthday party in July. So on to today's projects. I will post the April ones first. The April kit came with this really cute frame. Instead of just leaving the heart outline, I decided to add a picture of my son and gave this to my mother-in-law. I also decided to turn the belly band for the frame into a bag. I had seen this on another blog and thought this was a really cute idea. Then finally I used elements from the kit, plus some of my own to make a card. You can see the supplies I used for the card below it.


Stamps: April Paper Pumpkin
Paper: Coastal Cabana, Smokey Slate
Ink: Coastal Cabana, Pear Pizazz, Crisp Cantaloupe
Accessories: April Paper Pumpkin kit, Natural 7/8 cotton ribbon, Crisp Cantaloupe ruffled ribbon, Decorative Dots embossing folder, Deco Label framelit dies, Very Vintage designer buttons


Now I have a couple of super quick cards I made with the May kit. I made the Father's Day cards for my husband and father-in-law and then I used the elements to make a birthday card for my husband. Again, it took me no time to make these cards. Even the birthday card where I used some of my own elements didn't take very long (once I figured out what I was going to do). And how cute is that little tag on the father's day card. I love it! I still have leftovers so I will definitely be using them on another card.


Stamps: May Paper Pumpkin
Paper: Gumball Green
Ink: Marina Mist
Accessories: May Paper Pumpkin, Deco Label Framelit dies, Chevron embossing folder, Starburst Framelit dies


If you want to learn more about My Paper Pumpkin, please feel free to contact me. It is such a fun surprise each month! Or if you want to sign up, click on the link to the right! I will be hosting a Paper Pumpkin get together at my home on July 16th so you can get a look at what is included in the kits plus make a card or 2. If you would like to join in on the fun, just let me know!! :)