Wednesday, February 27, 2019

Decorated Note Pads


It's hump day!! I'm back sharing another group of items for my upcoming craft fair I'm attending. While I was searching pinterest for craft fairs items, I came across these little notepads that Angie Juda put together. LINK. I thought they were super cute and look easy to put together. Plus I knew that I had all the supplies I needed to make them right away. She uses coaster boards for her notebooks. I didn't have any of that but I found a bunch of card board that I had saved from My Paper Pumpkin boxes. This is one of those times, something useless I saved was turned into a project! :) The white note books were also items that I bought a while ago but never did anything with.


Originally I was going to use DSP from different packs but then as I was looking through the Share What You Love DSP stack, I found so many that I wanted to use, that I just stuck with the paper from this pack. I also like this paper because it's a little thicker than the regular DSP.


The front and back of the notepads use different paper. That's the fun thing about Stampin' Up! DSP, the 2 sides have different designs but coordinate so well together. I had a ton of binder clips at home that I have gotten from work so I dressed them up with the DSP as well. I added some coordinating ribbon (some of the notepads use retired ribbon) and a sweet little flower blossom.


If you notice, the flower blossom above isn't one of the colors you receive. I didn't like how any of the colors matched this particular DSP so I colored the Petal Pink flower with my Blackberry Bliss blends marker. Fun right!

Here is a look at the rest of the notepads I put together.


Aren't they so cute!! I think I'm going to take one of these to have at my desk at work. Maybe it will make my day more exciting to write some notes on a cute note pad!! :)

What do you think? Which one is your favorite??

Monday, February 18, 2019

Happy Home - Wall Decor


It's Monday again, just like that! Why do the weekends have to go by so quickly! I want more time to be lazy with the kids, haha! And I want more craft time!! I found some time yesterday to run downstairs and get crafty. I am doing a craft fair at a local brewery at the end of March so I want to have some items besides cards to sell. I've had this wood piece from Michael's for months now and haven't done anything with it. I knew I wanted to make a decor piece but I wasn't sure what I was going to do. I was feeling inspired yesterday and came up with this happy Home piece. How cute is it??


I used the Large Letter Framelits, Well Written Framelits, Be Mine Framelits and Tin Tile embossing folder. After looking back at this, I realized I did no stamping on it. But that's ok. It was fun using all of the different dies from the Well Written framelits. The little butterfly, bird and leaves are just adorable. And really once I figured out what elements I wanted to use, it didn't take that long to put together. Now I'm going to have to see if Michael's has these boards in other wood styles so I can make another one with different colors.

And now I'll show you a bunch of close ups of the project.


The little flowers have Happiness Blooms enamel dots as their centers. These enamel dots come in such fun colors!


Here you can see the embossing on the heart. The little bird also has a Happiness Blooms enamel dot for his eye.


After I die cut the heart, I added a Heart Epoxy droplet for a little shine. The butterflies have pearls in the center of their bodies.

What do you think? Have you guys made projects with only die cuts and no stamping? What have you done with the Well Said bundle?

Share your projects with me! I'd love to see them.

Friday, February 8, 2019

Well Wishes Thanks


Happy Friday!! It's the end of the week and I'm ready to get lazy and relax for a bit. We had a superbowl party last weekend so we were doing lots of cleaning to get the house looking somewhat decent. So I'm not feeling like doing any of that again this weekend. Actually what really needs to be cleaned/organized is my craft area. But that just seems like way too much of an undertaking and I'm not sure I'm in the mood for that. I'll probably just try to craft and make a bigger mess down there, ha!

Today's card using the new Well Said bundle. This bundle is a little pricier than others but I think it's well worth it. The script fonts in the dies are super fun and there are a ton of stamps in the set. The first thing I did was die cut several "thanks" words in white card stock. To make them easier to glue to the card stock, I put White card stock on the multipurpose adhesive sheets and then cut out the word thanks. This way all I had to do was peel off the back and glue them to the card. Much easier and less messy!


Originally, I planned to just leave the background white but it just seemed too plain to me. I wanted to do a light water color wash but again that just wasn't working either. So after some playing around, I ended up with this water color splatter background. I really like how it came out. Except I think this would work much better for a birthday card, at least to me I think it does. But since I already had all those "thanks" words die cut, I just continued on and finished the card.


After I glued all of the thanks on to the card, I stamped and embossed the "sending your way" in white on Bermuda Bay and Coastal Cabana card stock. The full sentiment is "sending healing thoughts your way" but I just cut out the words I wanted. That's a fun little trick to keep in mind when adding sentiments to your cards.


The final touches to the card are a strip of Glimmer paper, some Silver mini sequin trim and Silver's baker's twine.

I hope you enjoyed today's card. Have a great weekend!

Thursday, January 31, 2019

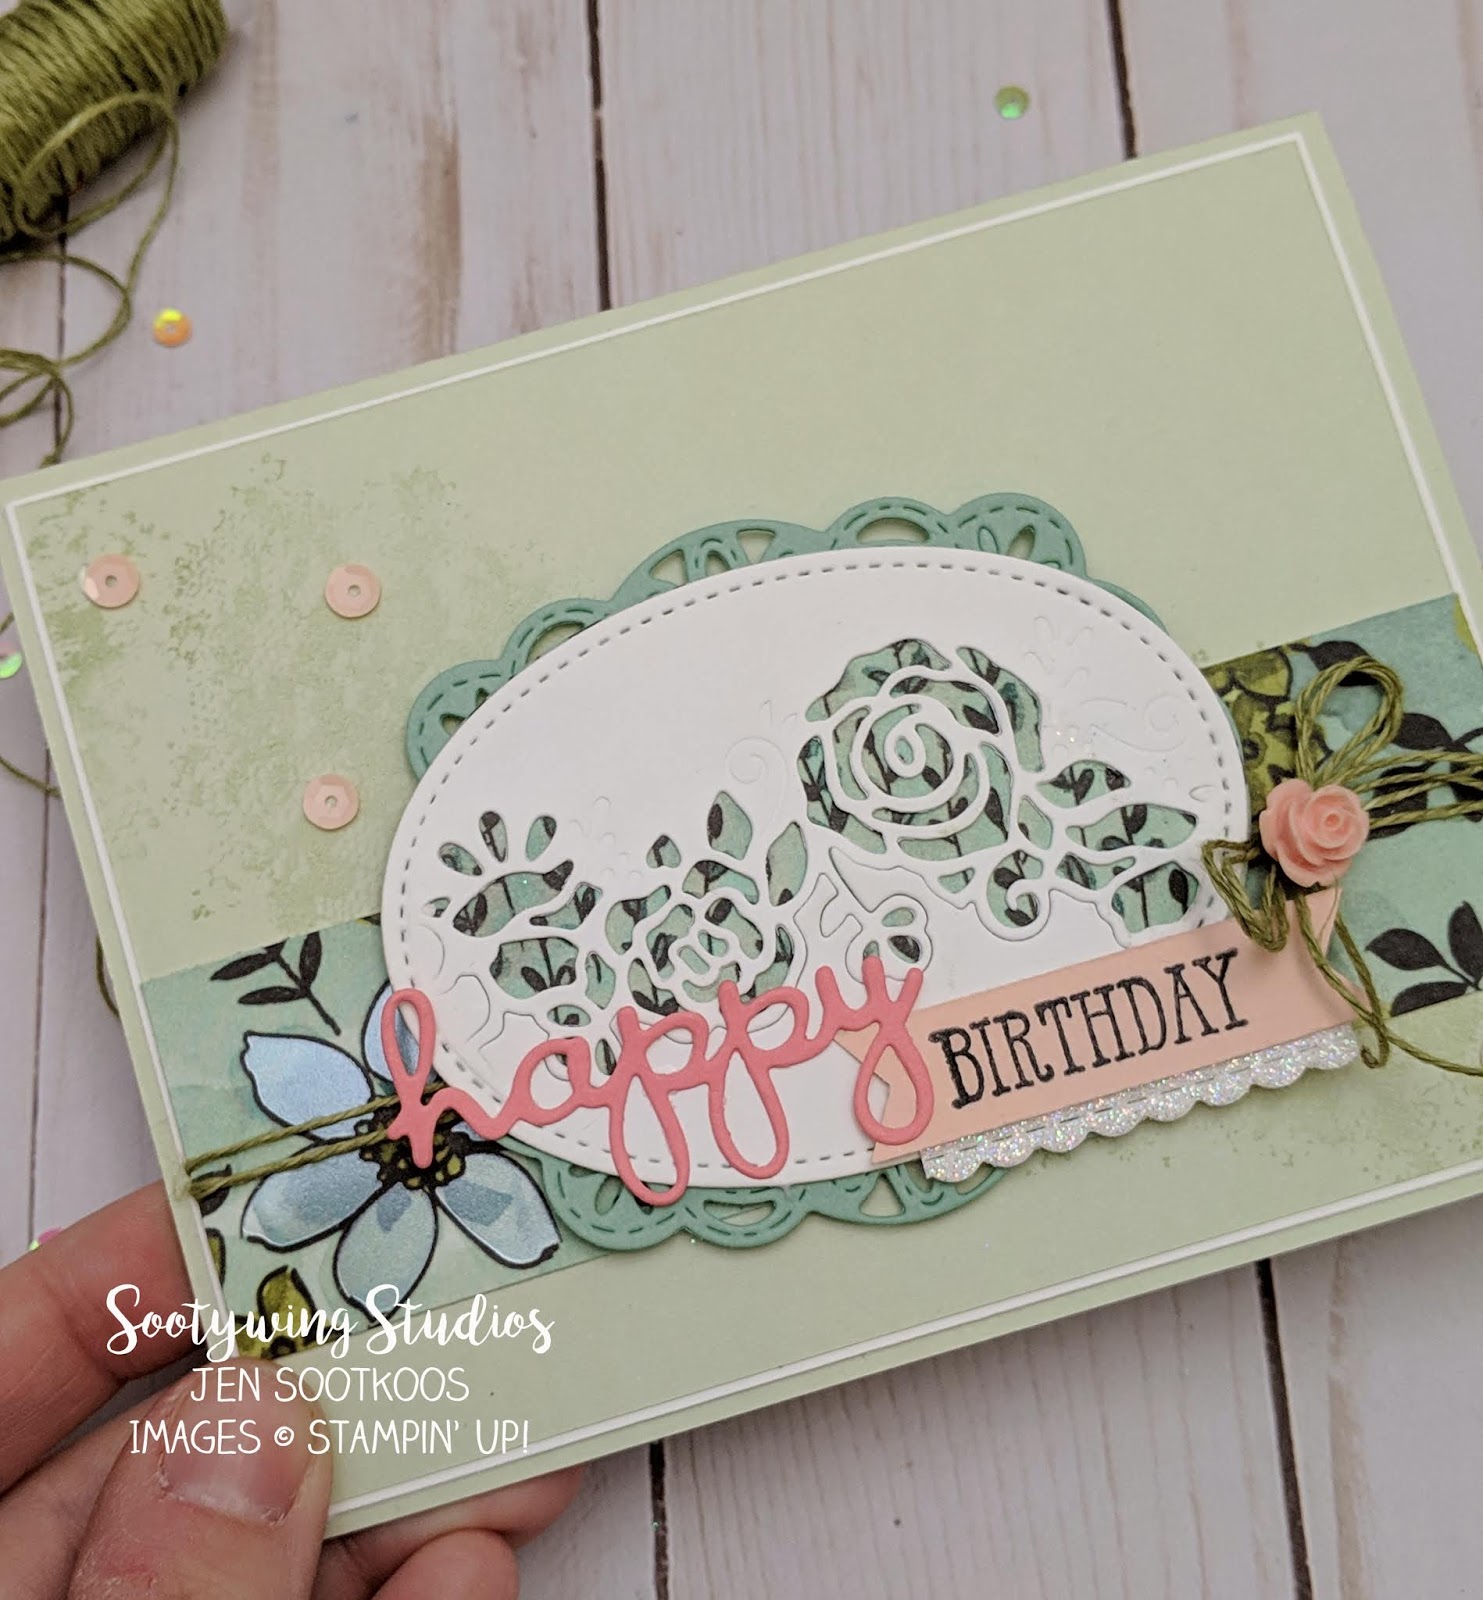
Sketch Challenge - Floral Birthday Card

Hello! I hope everyone is staying warm!! It was a brisk -4 this morning which I know is probably warm for some of those in the midwest. Let's hope this is short lived. For today's card, I went with springy colors. Spring can't get here soon enough.

I am playing along with the Global Design Project challenge this week.

For my entry, I used some new products from the Occasions catalog as well as some forgotten about DSP from the annual catalog.


I just got the Well Words bundle and I couldn't wait to use it!! I am in love with those word die cuts. How great is that "happy" font?!? I will definitely be using this bundle all the time!


I wanted to try something fun with the oval. I placed the oval stitched framelit on white cardstock, then I placed the floral die from the Lovely Flowers Edgelits dies on top of the oval framelit. So I ran both through at the same time. My hope was that the floral die would just die cut the center of the oval and it actually worked!! I backed the oval with paper from the Share What you Love DSP. I used another piece of DSP from that pack for the front of the card. I forgot how much I love this paper. There are some fun papers in this pack that have a nice pearlized finish.

If you look closely, I stamped the lace image from Southern Serenade in Soft Sea Foam ink on the Soft Sea Form card stock. I wanted to have a little bit of texture on the cardstock.


I finished the card off with Old Olive linen thread, a Petal Pink blossom element and Petal Pink adhesive backed sequins. I love all of the colors of this card! Petal Pink is one of my new favorite colors from the annual catalog.

Thanks for stopping by. Stay warm!!

Monday, January 28, 2019

Valentine's Banner


It's Monday again! These weekends just go by way to fast. Actually the month of January flew by as well! I've actually had this banner hanging on my mantel for a while now, I just haven't had the chance to write up a post about it.

This banner started with the cute heart and pom pom heart garland that I got from Pier 1. It was really cute but I thought it needed something else so I decided to spruce it up with some Stampin' supplies. I used the Be Mine Stitched Framelits along with the Large Letter Framelits to add XOXO to the garland. I used Powder Pink cardstock and the black and white DSP from the Botanical Butterfly DSP. (This DSP is FREE, get it now while you can!)


I did something a little different on each banner but they all have some hearts, a Gold glimmer letter and some Rose Metallic thread.


I also stamped the heart image from Forever Lovely in Powder Pink on each of the banners.


I used the Gold Library clips to attach them to the banner. That way if you wanted to change it out each year you can.


And here is what it looks like on my mantel. It's a cute little addition for Valentine's day. How could you not like some pom poms, hearts and glitter. :)


Thanks for stopping by!!

Sunday, January 20, 2019

Just Add Ink #440 - Valentine's Shaker Card


Happy Sunday!! The creative juices have been flowing in the past few days so with this wintery weather we've been having, I'm trying to take advantage as much as I can. We've had a wintery mix here so it's great weather to just stay inside and do nothing. The kids gave me the chance to get into my craft room to get crafty. The idea I had in my head for this card, came out just as I wanted. It did take a little trial and error to get there but I think it came out so cute. I decided to use this card as my entry for the Just Add Ink #440 challenge this week. The challenge this week was to add something new. You can find the challenge HERE.


My something "new" was using the Be Mine Framelits dies and the sentiment from January's Paper Pumpkin kit. I had the idea that I wanted to make a shaker heart and I also wanted to use the collection of hearts dies as part of the design. It took me a couple of times to get it right but how cute do all of those hearts look inside the large scalloped heart??


Oh and those little stamped hearts on the Pool Party card stock is from the January Paper Pumpkin kit as well. Aren't those fun! Inside the shaker heart I used a mix of Iridescent Sequin assortment plus some of the Sprinkles sequins from the Occasions catalog 2 years ago I think?


I hope you enjoy this super fun shaker card. Maybe it will brighten you up on this cold gloomy wintery day!

And I'll be back soon to share my Valentine's decor. I just had to share this card first because I loved how it came out!

Enjoy your day!

Thursday, January 17, 2019

GDP172 - Valentine's Kangaroo


Hello! I'm going to have a quick post today but I wanted to share the card I made for this week's Global Design Project challenge. (My other valentine's decor project will be posted in a couple of days.....just need to edit photos). This week's challenge can be found HERE. It's a Case the Designer Challenge. I like these challenges to help get the creative juices flowing.

Here is the card to CASE.

I decided to make a valentin'es card with this challenge. Now I just need to hide the card so my hubby doesn't see it. I'm on top of my game by having a card ready for him already, haha!!

I used the Animal Outing bundle for this card. At first I wanted to use it so I could use the Wild About You sentiment but then I realized that I used that sentiment on the anniversary card I gave him back in October so I wanted to use a different saying. I still decided to go with the animals from the set though. Instead of stamping and coloring them, I went the quick route and die cut the kangaroo and leaves from the Animal Expedition DSP. I don't usually do that but it's fun to change it up once in a while and it's so easy. Definitely helps the card making process.


I also used the new Be Mine Stitched Framelits. I really got these dies for that open heart border die. It's soooo cute! I decided to keep some of the hearts stuck in the die because it looked cool. The larger heart die with the "love you" staying is also from the framelits.


After I layered everything on the All My Love DSP, I added some of the Heart Epoxy Droplets to the card. They give it a fun little touch!

Thanks for stopping by. Have a wonderful Thursday!